Overview :
Documenting
the condition of a particular object (Equipment) is of great importance in
cases where detailed
records regarding the correct condition have to be kept for legal reasons. This
could Involve
critical values recorded for Machine or environmental protection purposes, hazardous
working areas
that are monitored for health and safety reasons, the condition of equipment in hospitals
(intensive care units), as well as measurements of emissions and pollution for objects of all types
In SAP System Measuring points describe the physical locations
at which a condition is described , ( For example, Temperature, Pressure
on a Boiler, Dash Board or Odometer of a Vehicle The characteristics associated with the measuring points
which record the value can only be numeric characteristic.
Measuring points are located on technical objects, in other words, on pieces of equipment or functional locations. For every measuring point there should be some characteristics to measure the reading.
Purpose :
For better monitoring of capacity utilization, maintenance objects have measuring points and counters to record flow quantities or operating hours, for instance. Measurement and counter readings are stored in the system in the form of measurement documents. These documents are the basis for performance-based maintenance planning.
Counter :
Counter is
type of measuring point, where a continuous reading is recorded (e.g. Kilometer, Hour Meter). Counter
readings are taken at counters at particular intervals and in particular
measurement units.
The above Picture given (Kilometer) is treat as a counter where Kilometer reading we can take from certain intervals.
Characteristics and Class :
Characteristics : Specification or Quality belonging to a Technical Object ( Equipment, Functional Location )Characteristics are used to store additional data or condition value.
Class : A Class is a collection of Characteristics. Class is assign to Equipment or Functional Location
Step 1 : Create Characteristics ( T Code : CT04)
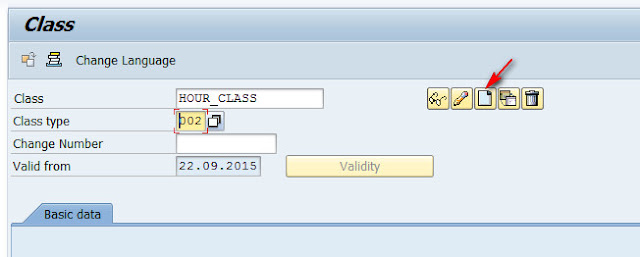
Step 2 : Create Class ( T Code : CL02)
Step 3 : Assign Class to Equipment
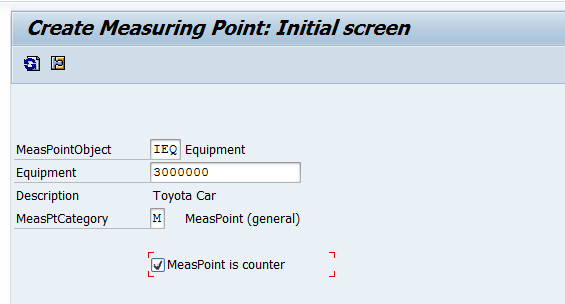
Step 4 : Create Measuring Point - IK01 (Counter Base)
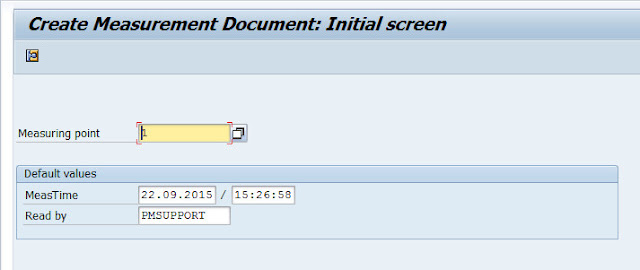
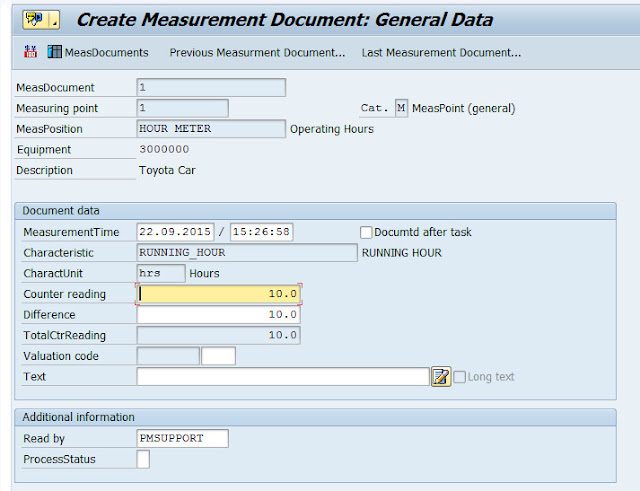
Step 5 : Create Measurement Document ( T Code : IK11)
Enter
Save
Step 6 :Measurement Document List : IK17
Configuration :
Define measuring points category
IMG>Plant maintenance & customers services>Master data in plant maintenance & customers services>Basic setting>Measuring point counter & measuring documents>Define measuring point category.
Click on new entry and create new measuring point category if required
Create no of ranges for measuring point
IMG>Plant maintenance & customers services>Master data in plant maintenance & customers services>Basic setting>Measuring point counter & measuring documents>Create no ranges for measuring point.
Click on intervals & create no ranges
Create no of ranges for measuring Documents
IMG>Plant maintenance & customers services>Master data in plant maintenance & customers services>Basic setting>Measuring point counter & measuring documents>Create no ranges for measuring documents
Define field selection for measuring point & measuring Documents
IMG>Plant maintenance & customers services>Master data in plant maintenance & customers services>Basic setting>Measuring point counter & measuring documents>Define field selection for measuring point & measuring Documents (T Code : OIMRC)
END


